A simple no-knead rustic-style artisan bread recipe proofed in your Instant Pot and baked to crusty perfection. Perfect for home bakers seeking easy, hands-free comfort bread.
This no-knead artisan bread has become a favorite in my kitchen because it gives you that rustic, bakery-style loaf without the time-consuming steps. Whether it’s for weekend dinners, soup nights, or simply the joy of warm bread with butter, this loaf is always worth making.
⭐⭐⭐⭐⭐ Excellent bread — my family loved it. I’ve made it five times already and plan to bake it for Christmas gifts this year.” — Debbie Brock


Author’s Note
I love baking bread — it’s one of the most satisfying recipes I find, and I’m always testing and trying to learn new techniques. This no-knead artisan loaf is a favorite because it gives you that bakery-style rustic crust and tender crumb with far less effort.
Thanks to the Instant Pot (or a warm proofing spot), the dough rises beautifully, then a hot oven gives you the golden crust that makes the wait worthwhile.
Grab a slice, butter it up and enjoy this foolproof artisan bread.
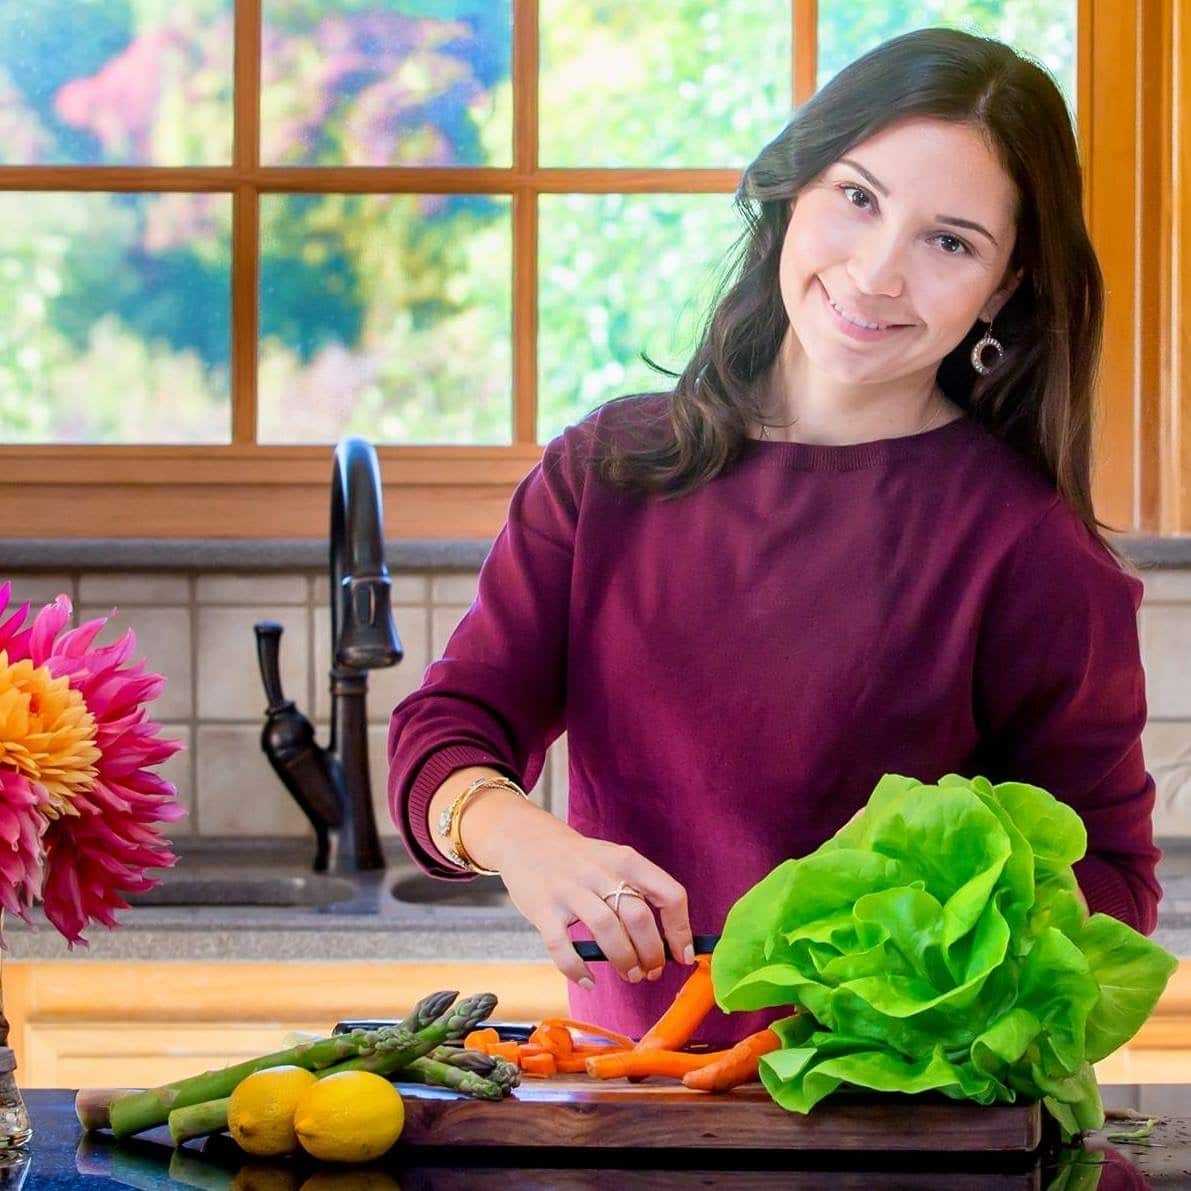
— Silvia
Check out this Quick Sandwich Bread recipe!
what is artisan bread?
Artisan bread is a rustic, crusty loaf with a soft, airy center that is full of those beautiful pockets that come from slow fermentation. Made in small batches and often sold fresh and unpackaged, it has a depth of flavor and texture that only time and patience can create. I still remember my first bite at a restaurant, dipped in a fragrant oil, and how instantly I fell in love. I decided right then I had to bake my own… only to learn that true artisan bread takes another full day of waiting, a lesson in patience, but so worth it.

Ingredient Notes
- Flour (bread or all-purpose): The base of your dough; bread flour gives a chewier, stronger structure while all-purpose keeps things soft and accessible.
- Instant yeast: Reliable and easy, it wakes up quickly and gives you a beautiful rise with no extra steps.
- Warm water: Helps activate the yeast and brings the dough together. Aim for warm, not hot.
- Salt: Essential for flavor and also controls the yeast so the dough doesn’t rise too fast.
- Honey or sugar: Just a touch of sweetness helps feed the yeast, encouraging a stronger, more active rise. Honey will add subtle flavor and moisture, while sugar creates excellent browning and a slightly softer crumb. Use one or the other.
- Olive oil (optional): Adds a hint of richness and makes the dough easier to handle.
- Optional mix-ins: Fresh herbs, seeds, or seasoning blends can be folded in for extra flavor (rosemary is my personal favorite).

silvia’s best tips for artisan bread success
• Let the dough rest longer than you think
Even an extra 30–60 minutes after shaping makes a huge difference. This final rest relaxes the gluten, helps the dough rise a bit more, and gives you a lighter, loftier crumb.
• Don’t rush the fermentation, this is where the magic happens
Slow fermentation develops flavor and helps break down the gluten, making the bread easier to digest. If you have time, let the dough chill overnight in the fridge for even better structure.
• Use a Dutch oven for bakery-style bread
Professional bread ovens inject steam to create that signature crackly crust. At home, a preheated Dutch oven traps the dough’s natural moisture and mimics that environment beautifully.
• Handle the dough gently
Artisan dough is soft, sticky, and delicate. Instead of kneading, think “fold and lift.” Don’t overwork the dough!
• Let it cool completely before slicing
It’s torture, I know (trust me!). But slicing too soon compresses the crumb and makes the texture gummy. Let the loaf rest at least 30 minutes so the interior can set.
• For extra flavor, experiment with mix-ins
Fresh rosemary, roasted garlic, olives, seeds, or even a sprinkle of flaky salt before baking can turn a simple loaf into something unforgettable.
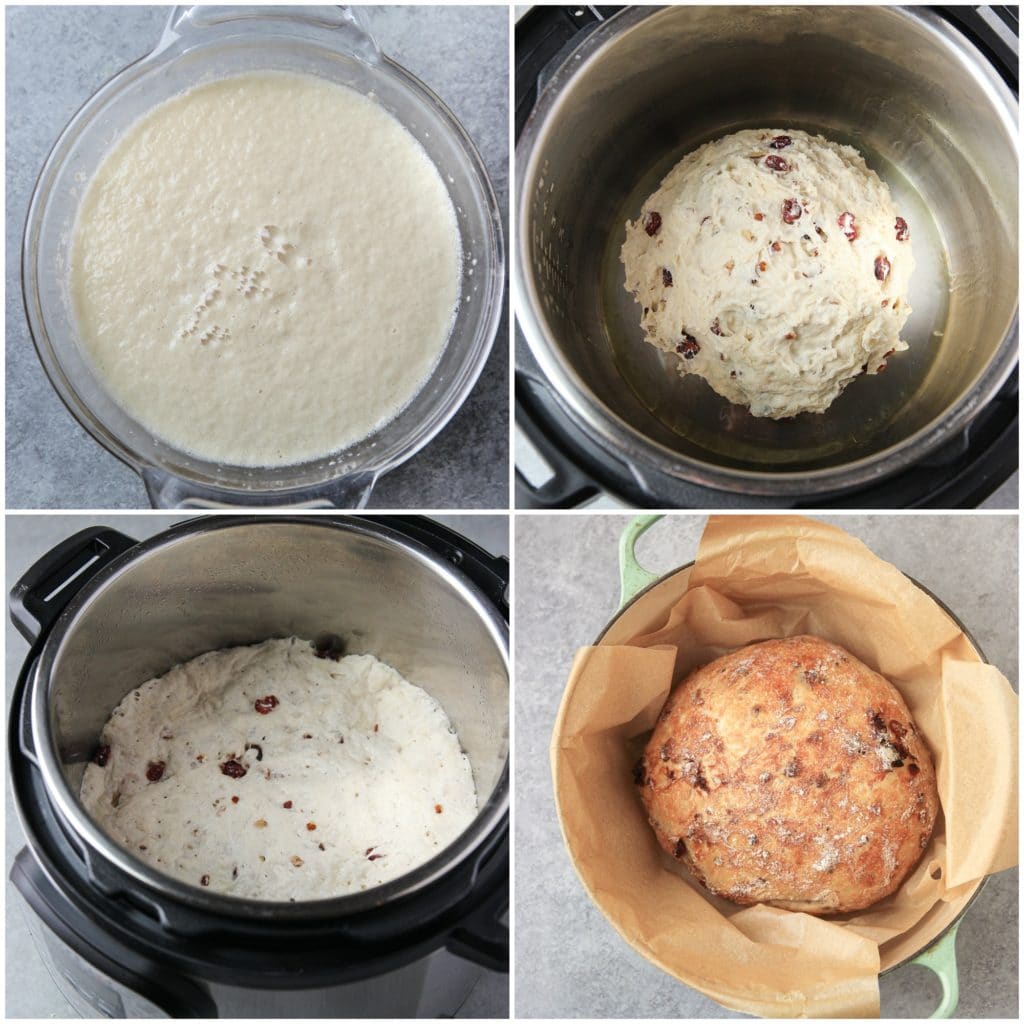
top right: bread dough going in to the IP
bottom left: bread dough after 4h on IP
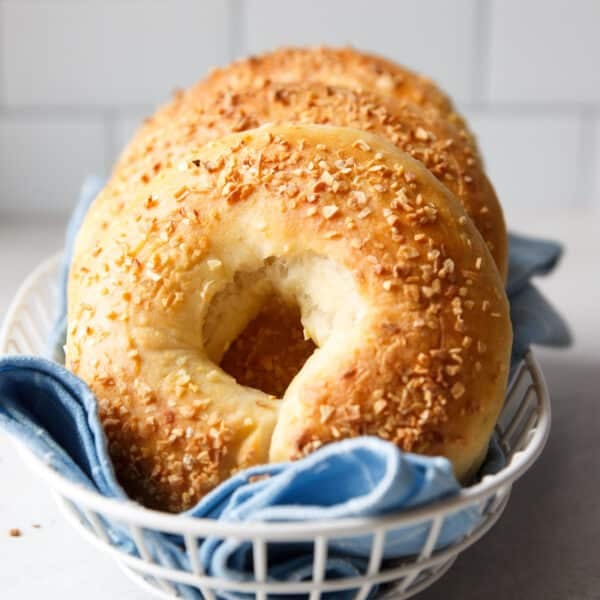
bottom right: artisan bread after baking
Avoid these common mistakes when making artisan bread (updated version)
Even with a simple, no-knead recipe, artisan bread has its personality and over time I’ve learned a few things that can make or break your loaf. Here are the most common mistakes I see (and have made myself!) along with the fixes that truly matter.
1. Not Checking Your Yeast Properly
The mistake: Skipping the activation step or ignoring yeast that doesn’t foam.
What happens: Flat, dense bread that barely rises.
My tip: Waiting the full 10 minutes to confirm the yeast forms a foamy layer on top is essential. If it doesn’t bubble, your yeast is likely old, inactive, or your water was too cold or too hot. Start over — it’s worth it.
2. Lining the Instant Pot With Parchment Paper
The mistake: Thinking parchment will help prevent sticking.
What happens: The paper gets in the way and makes lifting the dough harder. I know know…
My tip: Skip the parchment completely. Instead, grease the Instant Pot insert well, it will release the dough beautifully without any fuss.

3. Cutting the Proofing Time Too Short
The mistake: Stopping the Instant Pot before the dough has fully risen.
What happens: Underproofed dough with a tight crumb and limited oven spring.
My tip: If you must cut proofing short, you can safely stop around the 3 hour 30 minute but I wouldn’t go earlier. The dough needs that warm environment to develop texture and flavor.
4. Using Gluten-Free Flour
The mistake: Expecting the recipe to behave the same when swapping flour.
What happens: GF flour doesn’t form the elastic gluten network artisan bread depends on, leading to poor structure.
My tip: This recipe simply doesn’t work well using gluten-free flour. Use a traditional bread flour or all-purpose flour for the best results.
5. Cutting Into the Bread Too Soon
The mistake: Slicing right after baking because warm bread is irresistible.
What happens: The interior gets gummy and compresses, ruining that airy crumb.
My tip: Even if serving warm, wait 30 minutes before slicing. This gives the loaf time to set.
6. Not Personalizing the Mix-Ins
The mistake: Thinking you must stick to one flavor combination.
What happens: You miss out on a loaf that could truly be yours.
My tip: Cranberry pecan is delicious, but feel free to get creative. Try rosemary & sea salt, olives, roasted garlic, sunflower seeds, dried cherries, raisins.
Note: on a recent re-test I used this dough recipe to make focaccia. I used 1 head of garlic, a handful of fresh rosemary and about 1/2 cup of green olives. Chopped everything up and added to the dough. Baked in a sheet pan at 450F for 25 minutes until crust forms. Top it with fresh sea salt and you will enjoy the best and easiest focaccia bread!
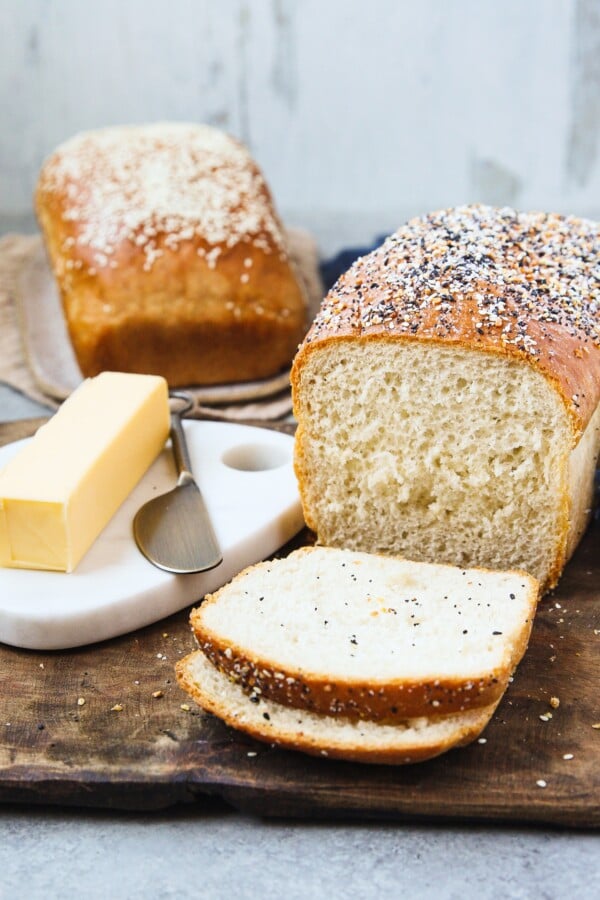
Other breads you’ll love next

No Knead Rustic-Style Artisan Bread
Equipment
- Dutch Oven
Ingredients
- 3 cups bread flour
- 1 tsp kosher salt
- 1/3 cup dried cranberries
- 1/4 cup pecan, finely diced
- 1 1/2 cups lukewarm water
- 1 1/2 tsp active dry yeast
- 1 tbsp honey or sugar
Instructions
- Mix lukewarm water with honey, stir to combine. Add in yeast, cover and wait about 10 minutes. Mixture will look foamy.
- In a large bowl combine flour, salt, cranberries and pecan. Set aside
- Pour yeast water into the flour bowl. Using a wooden spatula fold until all the flour are incorporated. You can finish this step using your hands, to fold into a ball/ loaf. Dough will be sticky and surface uneven.
- Place the bread dough in a greased instant pot, cover and turn pot on yogurt mode for 4 hours*. At the end the dough will be twice the size and have lost the round shape.
- When the time is up, add a little bit of flour to your counter/ working surface and transfer the bread dough from the instant pot to the prepared surface. Roll dough into a ball without overworking it, tucking any extra dough on to the bottom side. Let the bread sit on the counter while you pre-heat the oven.
- Place a dutch oven, cast iron or any oven-safe deep pan with cover in the oven and pre-heat to 450F. When oven is heated to 450F carefully remove dutch oven and sit it on a towel and line with parchment paper.
- Carefully place bread dough in the dutch over, cover and return to oven. Bake for 30 minutes covered. Remove lid and bake for an additional 15 minutes un-covered or until bread crust is nice and brown.
- Transfer to a cooling rack for at least 30 minutes. It can be served warm after that or wait until bread is completely cooled before you store it away.
Notes
Frequently Asked Questions
Can I use sugar instead of honey?
Yes! Replace the honey with 1 tablespoon of sugar. It feeds the yeast the same way and encourages great browning.Can I make this without a Dutch oven?
You can. Use a heavy oven-safe pot with a tight lid. You won’t get the exact same crust as a Dutch oven, but it will still be excellent.Do I have to use the Instant Pot for proofing?
Not at all. Any warm, draft-free spot works. The Instant Pot simply speeds things along on busy days. Note that older models of Instant pot do not have the yogurt mode for this step.Why is my dough so sticky?
No-knead dough is meant to be sticky so resist the urge to add more flour. Lightly wetting or oiling your hands makes handling it much easier.Can I refrigerate the dough overnight?
Yes, and the flavor gets even better. Just let it sit at room temperature for 30–45 minutes before shaping and baking.How do I know when the bread is done?
The crust will be deeply golden and the bottom will sound hollow when tapped. You may also hear the gentle “crackle” as it cools a sign of a good crust.Nutrition
Nutrition information is automatically calculated, so should only be used as an approximation.


I would like to make this but can’t get yeast in the stores right now – would wild sourdough starter work, if so how much?
Hi Julie, I haven’t tested with sourdough started so its hard for me to say. But I think its worth a try.
I made mine with cheese, garlic salt, and Italian seasoning, and it was SUPER yummy! Easy, fail-proof recipe! 💕
Hi Kristin, that sounds like a delicious flavored bread! Thanks for trying my recipe and stopping by to share your feedback!
This is my second time making this recipe and it’s great! I do add some orange zest to it like others suggest. I’m curious about the proofing in the instant pot. When i use the yogurt mode it’s on normal and takes way less time to proof. It usually doubles in about an hour and a half. Should I be using the low setting? Either way its delicious and next time I’ll be trying it using some savory herbs.
Thank you Jenna, that’s really good to hear! I have only tried the yogurt mode, and I probably would be happier if mine doubled in size so quickly. Interesting! I have tried savory also and loved it 🙂
This was my first try at making bread from scratch EVER. Plus, I’m still making friends with my IP, although I haven’t received the dreaded BURN notice yet, so I must be doing something right, lol! Anyway, I followed the recipe except omitted the cranberries and nuts. Success! Crunchy outside, soft inside, and so very tasty! Most importantly, my husband loved it, too. Our usual choice was frozen artisan rolls from the grocery store, but after one bite, he commented, “Can we have this from now on?” So thank you! I do have a question, though: Directions say to put the pan lined with parchment paper in the oven for the pre-heat. That gave me pause, assuming the paper would get pretty crusty, but I did it anyway because I’m a recipe follower. Parchment went in cast iron pan, cast iron lid went on top. When pre-heat was done, parchment WAS crusty, almost burnt in some spots. Not something I wanted to put my dough on. So I pitched it, got a new sheet, and proceeded to the delicious ending. Am I the only one that happened to? Did I do something wrong? Or should the dough go on the baked parchment? Just curious, as I will make this again. And again. And again…. 🙂
Hi Laurie! first of all THANK YOU for the nice review and feedback. I am so soooo happy to hear that you and your husband enjoy this recipe! As for the parchment paper, well… I am glad you switched to a fresh paper instead of the burned one. Mine did not burn, honestly not sure what happened there, and this is the first burn parchment note I get. In any regards, it does not matter if the parchment goes in before or after the dutch oven is heated. The dutch oven is the one that needs to be pre-heated. The reason why I add before is so that myself and others don’t get burned trying to put parchment paper on a very hot dutch oven. The idea is to plop the bread dough in and move away, lol. Anyway, fresh artisan breads are absolutely a treat, and thanks to the instant pot it is a quicker treat 🙂
I made your wonderful bread last week, but it really did not turn out why and I have no idea why. I followed your recipe exactly as it was written, but had to add more flour to be able to handle it long enough to get it into the instant pot. After 4 hours, it had doubled in size, but when I went to remove it, it actually poured like liquid onto my worksurface! Any idea what happened? I added enough flour to get it into the cast iron pot to bake and it came out really crispy, but dense because of the added flour.
that’s really strange Julie, and I have no idea why that happened. Especially since you added extra flour. Honestly from my experience, this might have happened because of outside factors like air temperature and humidity and sometimes brands and how old the ingredients are.
How much in instant yeast should i use?
Follow the same amount requested in the recipe.
I made this yesterday to go with q pot of soup and it was wonderful. How wonderful? There is only my husband and me and there’s none left today! I followed the recipe exactly except I omitted the fruit and nuts because I wanted plain bread. This is a definite keeper recipe–thanks!
Haha! That’s wonderful, I am so happy to hear!
I’ve recently started making artisan bread and this is my favorite recipe so far. The crust is perfect: crusty but not too hard. I wonder what exchanging some of the water with cranberry juice would taste like? I know it would make it sweeter but would that negatively affect the rising properties?
I believe that the moisture content of the fresh cranberries wouldn’t be ideal for baking bread, but at the same time I haven’t tried it. I have tried baking muffins and such and it worked good
This is my first time making bread. The recipe turned out great. I didn’t want to invest in bread flour until I had proof of concept, so just used AP. Even with subpar flour it was soooo good. I changed it up a little and added golden raisins, and as recommended in a previous comment orange zest. It made a fantastic breakfast bread. In fact, I’m making two more loaves this week to take on a weekend vacation with friends. We’ll use it as part of a continental breakfast. We all used to live in Germany and crave those fantastic breakfasts we used to have while traveling in European hotels. This bread will fit right in!
That’s so good to hear Michelle! Glad you enjoyed the recipe and will be making it again for your trip.
Oh, this was so wonderful. I didn’t use parchment paper in the Instant Pot, and it came out fine. The parchment paper made lifting the loaf of bread out of the cast iron pot very easy. Beyond those basics, the loaf of artisan bread was gorgeous and tasted even better!! I used Trader Joe’s Orange Flavored Dried Cranberries, as I couldn’t find the ones you recommended online. Again, I can’t say thank you enough, Sylvia!
You are very welcome Anne, and I am so glad you had a good experience and enjoyed this recipe. Thanks for your feedback and hope to see you back for more!! 🙂 Silvia